Mastering the art of cutting round cakes ensures consistent, professional results. This guide offers step-by-step techniques for achieving perfectly sized slices every time, regardless of skill level.
Importance of Proper Cake Cutting Techniques
Proper cake cutting techniques ensure even, professional-looking slices, preventing uneven portions and messy presentation. They maintain the cake’s structure, preserving its appearance for special occasions like weddings or parties. Even distribution of frosting and cake layers is achieved, enhancing both taste and visual appeal. Additionally, precise cutting maximizes the number of servings, reducing waste and ensuring every guest enjoys a perfectly sized slice. Mastering these techniques is essential for hosts and bakers aiming to impress with flawless results every time.
Tools and Equipment Needed for Cutting Round Cakes
A sharp serrated knife, cake stand or serving plate, and serving spatula are essential. A cake server or tongs and a clean tray for arranging slices are also useful.
Essential Knives for Cutting Round Cakes
A serrated knife is the most critical tool for cutting round cakes, as it provides clean, even cuts. Use a sharp, long-bladed serrated knife for precision and control. Offset serrated knives are ideal for smooth, horizontal cuts. A smaller serrated utility knife can help with detailed work, like removing decorations or creating smaller slices. Dull knives risk tearing the cake, so ensure your blade is sharp for the best results. This ensures even distribution of frosting and cake, making each slice look professional and appealing.
Other Necessary Tools: Serving Utensils and Trays
Beyond knives, essential tools for cutting round cakes include sturdy serving utensils and trays. A cake server or spatula is crucial for transferring slices neatly. Use a flat, wide spatula to lift and place slices without breaking. Tongs or serving forks can also help portion out slices, especially for smaller cakes. A large, sturdy tray or serving platter is vital for organizing and displaying the cut slices. Additionally, a cake stand can elevate the cake, making it easier to cut and serve. Ensure all tools are clean and within reach for efficient slicing and serving.
Preparing the Cake for Cutting
Preparing the cake for cutting involves ensuring it’s stable and secure. Remove any decorations and let the cake set on a flat surface.
Removing Decorations and Toppings
Before cutting, remove all decorations, including ribbons, toppers, and dowels if it’s a tiered cake. Gently take off any edible or non-edible items to ensure a smooth cutting process. This step prevents damage to the cake and makes slicing even and clean. Use a serrated knife to carefully remove large decorations or toppings. Place the cake on a stable surface and ensure it’s completely flat. This preparation ensures safe and precise cutting, preserving the cake’s structure and appearance for perfect servings.
Stabilizing the Cake for Even Slicing
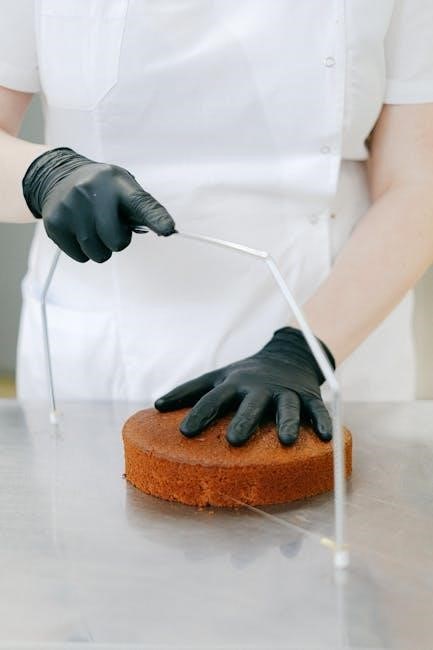
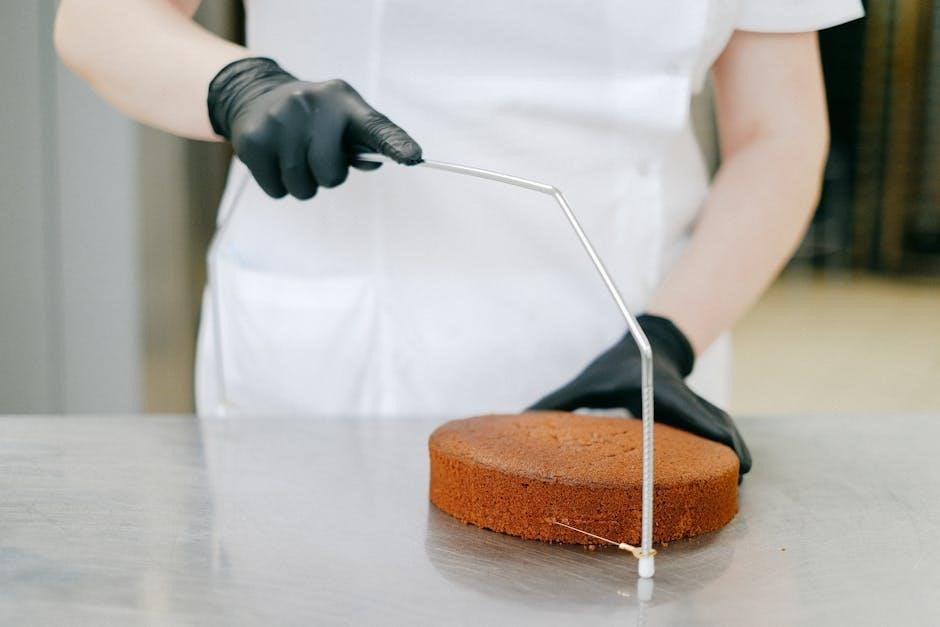
To ensure even slicing, place the cake on a flat, stable surface, such as a cake stand or non-slip mat. Make sure the cake is completely flat and even. If necessary, use a small amount of frosting or a dab of water to secure the cake to the surface. This prevents the cake from shifting during cutting. Use a serrated knife and maintain gentle, consistent pressure. For tiered cakes, stabilize each tier separately before slicing. A steady base ensures clean, even cuts and prevents the cake from breaking or tilting.
Basic Slicing Techniques for Round Cakes
Start by cutting the cake in half through the center. Make radial slices from the center outward, ensuring equal-sized wedges for consistent portion control and presentation.
Initial Cuts: Halving the Cake
To begin, place the cake on a stable surface and ensure it is level. Using a serrated knife, make a vertical cut straight down through the center of the cake to divide it into two equal halves. This initial cut is crucial for achieving uniform slices. Rotate the cake 180 degrees and make a second vertical cut directly opposite the first, ensuring symmetry. These initial cuts provide a foundation for creating even, consistent wedges or slices.
- Start with a vertical cut through the center.
- Rotate the cake and cut directly opposite the first cut.
- This method ensures even distribution for further slicing.
Creating Equal Wedges and Slices
After halving the cake, use radial slicing to create equal wedges. Start by making small, even cuts from the center outward, rotating the cake as you go. For uniform slices, maintain consistent knife pressure and spacing between cuts. Alternatively, use a grid cutting method by making parallel vertical and horizontal cuts, ensuring each slice is the same size. This technique is especially effective for larger cakes and guarantees professional-looking results. Always wipe the knife between cuts to avoid crumbs and frosting transfer.
- Use radial slicing for symmetrical wedges.
- Apply grid cutting for uniform rectangular slices.
- Wipe the knife after each cut for clean results.
Advanced Cutting Methods
Explore advanced techniques like radial slicing for even wedges and grid cutting for uniform slices. Perfect for large cakes, ensuring professional results every time.
Tip: Consistent knife placement ensures flawless cuts.
Radial Slicing for Even Portions
Radial slicing is a method where cuts originate from the center, creating equal wedges. Start by halving the cake with two perpendicular cuts. For more slices, rotate the cake and cut additional wedges of the same angle. Use a serrated knife and a cake stand for easy rotation. Score the cake lightly before cutting to guide your knife. This technique ensures uniform portions and a professional appearance. Wipe the knife between cuts to avoid crumbs and frosting transfer, resulting in clean, even slices every time.
Grid Cutting for Uniform Servings
Grid cutting involves dividing the cake into equal-sized rectangular portions by making vertical and horizontal cuts. Start by cutting the cake in half vertically, then into thirds or fourths horizontally. For larger cakes, add more cuts to create smaller servings. This method is ideal for events requiring uniform slices. Use a serrated knife and a cake stand for precision. Score the cake lightly before cutting to ensure straight lines. This technique maximizes the number of servings while maintaining consistency in size and appearance, making it perfect for formal gatherings or weddings.
Cutting Cakes of Different Sizes
Cutting round cakes of varying sizes requires adjusting techniques to ensure even portions. Smaller cakes (6-8 inches) are easily sliced into wedges, while larger cakes (10-16 inches) benefit from scoring and radial cuts for uniform servings.
Small Round Cakes (6-8 Inches)
For smaller round cakes (6-8 inches), start by scoring the center to guide your knife. Cut the cake into wedges, slicing from the center outward. This method ensures even portions. For 6-inch cakes, slice into 6-8 equal wedges, while 8-inch cakes can yield 8-10 slices. Use a serrated knife for clean cuts and wipe it between slices to prevent crumbs. Rotate the cake as you cut to maintain balance. This technique guarantees uniform servings and a professional appearance for any occasion.
Large Round Cakes (10-16 Inches)
For larger round cakes (10-16 inches), begin by cutting a circle 2 inches inward from the edge; This creates an outer ring and a smaller inner circle. Slice the outer ring into uniform wedges, then cut the inner circle into smaller, equal portions. Use a serrated knife and make vertical cuts from the top to the bottom. Rotate the cake after each cut to maintain balance. This method ensures even distribution of frosting and cake, providing consistent servings for events or gatherings.
Portion Control and Serving Sizes
Portion control ensures consistent servings. Standard slices are 1-1.5 inches wide for dessert portions and 0.75-1 inch for coffee portions, ensuring even distribution of cake and frosting.
Standard Serving Sizes for Round Cakes
Standard serving sizes for round cakes are designed to ensure consistency and fairness. A dessert portion is typically 1×2 inches (2.5cm x 5cm), while a coffee portion is 1×1 inch (2.5cm x 2.5cm). For larger cakes, such as 12-inch or 16-inch rounds, slices can be slightly larger but should remain uniform. To achieve this, mark the cake edge at equal intervals, then cut evenly. This method ensures every guest receives a fair and visually appealing slice, whether for a wedding, event, or casual gathering.
Adjusting Slice Sizes for Events
Adjusting slice sizes for events ensures every guest receives a fair portion. For larger gatherings, consider cutting smaller slices or using event-style servings. Radial slicing allows for even distribution, while grid cutting offers uniformity. For smaller events, slightly larger slices can be served. Use a serrated knife to score the cake first, then cut cleanly. This ensures consistent portions and prevents uneven slices. Whether it’s a wedding or a casual party, adjusting slice sizes maximizes servings while maintaining presentation and guest satisfaction.
Additional Tips for Perfect Slices
Use a serrated knife and score the cake before cutting to ensure clean, crumb-free slices. Wipe the knife between cuts for even, professional-looking portions every time.
Maintaining Clean and Crumb-Free Cuts
To achieve clean, crumb-free cuts, use a serrated knife and ensure it’s sharp. Score the cake lightly before slicing to guide the knife. Wipe the blade with a damp cloth between cuts to remove crumbs and frosting residue. This prevents transferring debris to subsequent slices. For tiered cakes, cut one layer at a time to maintain stability. Serve slices immediately to preserve their appearance and texture. Clean cuts enhance both the visual appeal and professionalism of your cake presentation, ensuring every slice looks as good as the first.
Handling Multi-Tiered Round Cakes
For multi-tiered round cakes, begin by removing all decorations and dowels. Use a serrated knife to cut each tier separately, starting from the bottom. Stabilize each layer with a cake stand or serving tray. Cut one tier at a time, ensuring even slices. After slicing, use a cake server or spatula to carefully transfer slices to plates. This method prevents crumbling and ensures a clean presentation. Always maintain even pressure and wipe the knife between cuts to avoid transferring crumbs or frosting between tiers.
Printable Cake Cutting Guide
Download our printable cake cutting guide for round cakes, available in various sizes (6-16 inches). Ensure even, professional slices every time with these easy-to-follow templates.
Downloading and Using the Guide
Access our printable cake cutting guides for round cakes in sizes from 6 to 16 inches. Each guide is available as a downloadable PDF, featuring clear measurements and diagrams. Print the guide corresponding to your cake size and place it beside the cake for reference. Use the markings to score and cut evenly. Perfect for weddings and events, these guides ensure uniform portions. Follow the step-by-step instructions to achieve professional results and impress your guests with perfectly sized slices.
Common Mistakes to Avoid
Apply too much pressure, causing uneven cuts. Use a dull knife, leading to jagged edges. Forget to wipe the knife between cuts, spreading crumbs. Neglect to let the cake set before slicing, resulting in breakage. Cut in a sawing motion instead of straight, smooth strokes for clean results. Avoid these errors for professional-looking slices.
Ensuring Even Distribution of Frosting and Cake
The key to achieving even distribution lies in precise cutting techniques. Start by scoring the cake lightly before slicing to guide your knife. Use a serrated knife and cut in smooth, straight motions. Rotate the cake after each slice to maintain balance and prevent uneven wear. Wipe the knife between cuts to avoid transferring crumbs or excess frosting. This ensures each slice has an equal ratio of cake to frosting, creating uniform portions for a professional finish.