Understanding Ham Shanks
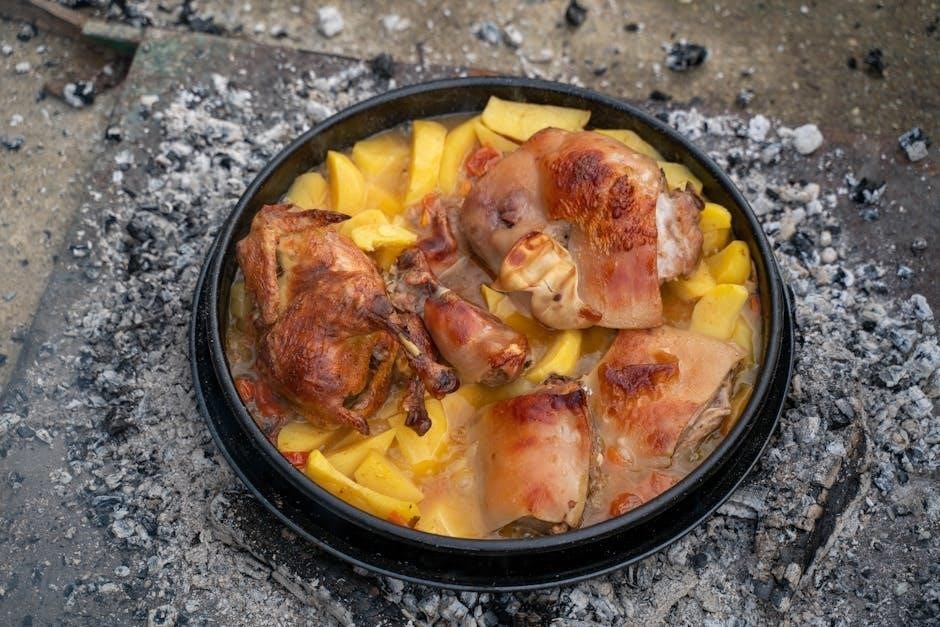
Ham shanks offer a flavorful‚ economical cut‚ perfect for slow cooking methods like braising or baking‚ yielding tender‚ moist results with delightful glaze options.
Quality ham shanks benefit from soaking to reduce saltiness‚ and Dakin Farm hams are highly recommended for superior flavor and overall cooking experience.
What is a Ham Shank?
Ham shanks are portions cut from the leg of a pig‚ specifically the lower part‚ offering a robust‚ meaty flavor profile. Often sold smoked or raw‚ they require longer cooking times to become tender‚ making them ideal for slow-cooking techniques.
Unlike more tender cuts‚ the shank boasts significant connective tissue‚ which breaks down during extended cooking‚ resulting in incredibly moist and flavorful meat; This cut is particularly well-suited for braising or baking‚ and benefits greatly from flavorful glazes like honey-mustard or brown sugar.
Many cooks prefer soaking the shank overnight to mitigate saltiness‚ especially with pre-smoked varieties.
Types of Ham Shanks (Smoked vs. Raw)
Ham shanks are available in two primary forms: smoked and raw. Smoked ham shanks have already been cured and smoked‚ imparting a distinct flavor and reducing initial cooking time‚ though soaking is still recommended to manage salt levels.
Raw pork shanks‚ conversely‚ require full curing and cooking‚ offering greater control over the final flavor profile. They benefit significantly from brining or marinating before cooking to enhance moisture and tenderness.
Both types respond well to slow-cooking methods‚ but smoked shanks are closer to being ready-to-eat‚ while raw shanks demand a more comprehensive cooking process.
Identifying a Quality Ham Shank
A quality ham shank should exhibit a rich‚ pinkish hue‚ indicating proper curing. Look for a shank with a good amount of meat clinging to the bone‚ avoiding those appearing overly bony or with minimal flesh.
The fat marbling within the shank contributes to flavor and moisture‚ so a moderate amount is desirable. If purchasing raw‚ ensure the shank smells fresh‚ not sour or off-putting.
Considering the source is crucial; Dakin Farm hams are frequently praised for their quality. A firm texture suggests freshness‚ while a slimy feel indicates spoilage.
Preparing the Ham Shank for Cooking
Proper preparation involves soaking the shank overnight to remove excess salt‚ or a Coca-Cola soak for two days‚ followed by trimming any excessive fat.
Soaking the Ham Shank (Salt Removal)
Soaking is crucial for removing excess salt from the ham shank‚ especially if it’s a heavily cured variety. Submerge the shank in cold water overnight‚ changing the water several times – at least three or four – to effectively draw out the salt.
Alternatively‚ a unique method involves soaking the shank in Coca-Cola for up to two days in the refrigerator. This surprisingly effective technique not only reduces saltiness but also tenderizes the meat and imparts a subtle sweetness.
Regardless of the chosen method‚ thorough soaking ensures a more balanced flavor profile in the final cooked product‚ preventing an overly salty taste.
Coca-Cola Soak Method
For a unique approach to salt removal and tenderization‚ consider soaking your ham shank in Coca-Cola. Fully submerge the shank in Coca-Cola and refrigerate for a period of up to two days. This method isn’t just folklore; the acids in the cola help break down the proteins‚ resulting in a remarkably tender final product.
The sugars present also contribute to a subtle sweetness that complements the savory ham flavor. Ensure the shank remains fully immersed throughout the soaking process.
After soaking‚ discard the Coca-Cola and pat the shank dry before proceeding with your chosen cooking method.
Trimming Excess Fat
Before cooking‚ assess your ham shank and trim away any excessively thick layers of fat. While some fat is desirable for flavor and moisture‚ large deposits can render unevenly and detract from the overall experience. Use a sharp knife to carefully remove the excess‚ leaving a thin layer to baste the meat during cooking.
This step isn’t about eliminating all fat‚ but rather refining it for optimal results. A well-trimmed shank will allow glazes and rubs to adhere better‚ enhancing the flavor profile.
Remember‚ a little fat contributes to tenderness and taste!
Cooking Methods: Baked Ham Shank
Baked ham shank benefits from a foil wrap during initial cooking‚ followed by a glaze application and a final bake to caramelize the surface beautifully.
Mustard and brown sugar create a classic‚ delicious coating‚ complemented by pineapple rings for added sweetness and visual appeal.
Foil Wrapping Technique
Employing the foil wrapping technique is crucial for retaining moisture during the initial baking phase of your ham shank. Begin by lining your cake pan or baking dish with a generous piece of heavy-duty aluminum foil‚ ensuring it extends up the sides.
Place the ham shank‚ cut-side down‚ within the foil-lined dish. This prevents direct heat exposure and keeps the meat incredibly succulent. Carefully bring the foil up and over the ham shank‚ creating a tightly sealed packet. Add more foil if necessary to ensure complete enclosure.
This method essentially steams the ham‚ resulting in a remarkably tender and flavorful outcome. The foil prevents the glaze from burning prematurely‚ allowing for a perfect caramelization later.
Mustard and Brown Sugar Glaze
Creating a mustard and brown sugar glaze is a classic pairing for ham shanks‚ enhancing its natural sweetness with a tangy counterpoint. Begin by generously coating the ham shank with prepared yellow mustard‚ ensuring every surface is covered.
Next‚ firmly pack a layer of brown sugar over the mustard. The sugar caramelizes beautifully during baking‚ forming a delectable‚ slightly sticky crust. This combination provides a wonderful balance of flavors‚ complementing the savory ham perfectly.
The mustard acts as a binder for the sugar and adds a delightful zing‚ while the brown sugar contributes depth and richness. It’s a simple yet incredibly effective glaze!
Pineapple Ring Application
Adding pineapple rings to your ham shank isn’t just for aesthetics; it infuses a subtle tropical sweetness that beautifully complements the savory meat. Arrange pineapple rings around the sides of the ham shank after applying the mustard and brown sugar glaze.
Secure the rings in place using toothpicks‚ ensuring they remain attached throughout the baking process. The pineapple caramelizes alongside the glaze‚ creating a visually appealing and flavorful crust.
This technique adds a touch of elegance and a burst of fruity flavor‚ elevating the overall dining experience. It’s a classic garnish for a reason!
Baking Time and Temperature
Baking time and temperature for your ham shank depend on its weight and whether it’s pre-cooked. Always refer to the package instructions as a starting point. Generally‚ a baking temperature of 325°F (160°C) is recommended.
For a fully wrapped ham shank‚ bake for approximately 10-14 minutes per pound. During the last 30-60 minutes‚ uncover the ham to allow the glaze to caramelize. A blast of high heat at the end enhances the surface.
Consistent monitoring with a meat thermometer is crucial for achieving optimal doneness and tenderness.
Cooking Methods: Braising Ham Shank
Braising a ham shank involves searing it first‚ then simmering in flavorful liquid – like cola or broth – for hours‚ resulting in incredibly tender meat.
Choosing a Braising Liquid
Selecting the right braising liquid significantly impacts the ham shank’s final flavor profile. Many cooks advocate for Coca-Cola‚ believing its sugars tenderize the meat and impart a unique sweetness during the extended braising process. Others prefer traditional options like chicken or vegetable broth‚ allowing the ham’s natural smoky flavor to shine.
Consider adding aromatic vegetables – onions‚ carrots‚ and celery – to the braising liquid for depth. Wine‚ particularly a dry white wine‚ can also contribute complexity. The key is to choose a liquid that complements the ham’s saltiness and enhances its inherent richness. Remember to ensure the shank is mostly submerged throughout the braising duration.
Searing the Ham Shank
Searing the ham shank before braising isn’t strictly necessary‚ given it’s already cured‚ but it develops a richer‚ more complex flavor. Pat the shank dry with paper towels to ensure a good sear. Heat a tablespoon or two of oil in a large‚ heavy-bottomed pot or Dutch oven over medium-high heat.
Carefully place the ham shank in the hot pot and sear on all sides until nicely browned – about 2-3 minutes per side. This caramelization adds depth and enhances the overall taste. Don’t overcrowd the pot; sear in batches if needed. After searing‚ proceed directly to adding the braising liquid and other ingredients.
Braising Time and Temperature
Braising a ham shank requires low and slow cooking to break down the connective tissues and achieve maximum tenderness. After searing‚ add enough braising liquid – such as chicken broth‚ apple cider‚ or even Coca-Cola – to almost cover the shank. Bring to a simmer‚ then reduce heat to low‚ cover tightly‚ and braise.
A typical braising time is 3-4 hours‚ or until the meat is falling off the bone. Maintain a consistent simmer; avoid boiling. Check the liquid level periodically‚ adding more if needed. Once tender‚ remove the shank and allow it to rest before shredding or serving.
Flavor Enhancements & Glazes
Honey-mustard glazes and brown sugar variations beautifully complement ham shanks‚ while spice rubs add depth. These enhance the natural savory flavors during cooking.
Honey-Mustard Glaze Recipe
Creating a delightful honey-mustard glaze is remarkably simple and elevates the ham shank’s flavor profile. Begin with 1/2 cup of honey‚ combining it with 1/4 cup of prepared yellow mustard – a key component for that classic tang. Add a tablespoon of Dijon mustard for a more complex mustard note.
For a touch of warmth‚ incorporate a teaspoon of ground cloves or a pinch of cinnamon. A splash of apple cider vinegar‚ about a tablespoon‚ balances the sweetness. Whisk all ingredients thoroughly until well combined. This glaze is best applied during the last 30-45 minutes of baking‚ basting frequently for a beautifully burnished and flavorful finish.
Brown Sugar Glaze Variations
Beyond a simple brown sugar coating‚ explore exciting glaze variations for your ham shank. Infuse the brown sugar with spices like cinnamon‚ nutmeg‚ or allspice for a warm‚ aromatic profile. A touch of maple syrup adds depth and complexity‚ complementing the pork beautifully.
For a tangy twist‚ incorporate a tablespoon of Dijon mustard or a splash of apple cider vinegar. Consider adding a hint of smoked paprika for a smoky undertone. Experiment with citrus zest – orange or lemon – to brighten the glaze. Remember to pack the glaze firmly onto the mustard-coated ham shank before baking.
Spice Rubs for Ham Shanks
Elevate your ham shank’s flavor with a custom spice rub! Combine brown sugar with paprika‚ garlic powder‚ onion powder‚ and a pinch of cayenne pepper for a savory-sweet kick. For a warmer profile‚ incorporate cinnamon‚ cloves‚ and nutmeg.
Smoked paprika adds a delightful smoky depth‚ while mustard powder enhances the overall flavor. Don’t hesitate to experiment with herbs like rosemary or thyme. Generously rub the spice mixture all over the ham shank before cooking‚ ensuring even coverage. This creates a flavorful crust during baking or braising‚ enhancing the overall experience.

Internal Temperature & Doneness
Use a meat thermometer to ensure the ham shank reaches a safe internal temperature of 145°F (63°C) for optimal tenderness and deliciousness.
Using a Meat Thermometer
Employing a meat thermometer is crucial for accurately determining the ham shank’s doneness‚ preventing undercooking or‚ more commonly‚ overcooking which leads to dryness. Insert the thermometer into the thickest part of the shank‚ avoiding bone contact for a precise reading.
Digital thermometers provide quick and reliable results‚ while traditional dial thermometers require a bit more patience. Regularly check the temperature during the final stages of cooking‚ as temperatures can rise quickly. Remember‚ consistent monitoring ensures a perfectly cooked‚ tender‚ and flavorful ham shank every time‚ maximizing your culinary success.
Target Internal Temperature
Achieving the correct internal temperature is paramount for a safe and delicious ham shank. The USDA recommends a minimum internal temperature of 145°F (63°C) for fully cooked ham. However‚ many cooks prefer a slightly higher temperature‚ around 160°F (71°C)‚ for optimal tenderness and flavor.
Remember that carryover cooking will continue to raise the temperature slightly after removal from the heat source. Therefore‚ removing the ham shank when it reaches 155°F-158°F allows for a perfectly moist and tender result. Always verify with a reliable meat thermometer for accuracy and food safety.
Checking for Tenderness
Beyond temperature‚ assessing tenderness is crucial for a perfectly cooked ham shank. Gently insert a fork into the thickest part of the meat; it should slide in with minimal resistance. The meat should appear moist and slightly pull away from the bone‚ indicating it’s become beautifully tender during the cooking process.
If resistance is met‚ continue cooking for an additional 15-20 minutes and retest. Remember‚ slow cooking methods like braising naturally yield a more tender result. Patience is key to unlocking the full potential of this flavorful cut!
Serving Suggestions
Ham shank pairs wonderfully with scalloped potatoes‚ roasted vegetables‚ or green bean casserole‚ making it ideal for gatherings and providing delicious leftovers!
Pairing with Side Dishes
Ham shank’s rich‚ savory flavor profile lends itself beautifully to a variety of side dishes. Classic choices like scalloped potatoes‚ creamy mashed potatoes‚ or au gratin potatoes provide a comforting and complementary texture. Roasted root vegetables‚ such as carrots and parsnips‚ offer a touch of sweetness that balances the ham’s saltiness.
Green bean casserole‚ glazed carrots‚ or a simple green salad also make excellent accompaniments. For a heartier meal‚ consider serving with mac and cheese or baked beans. Don’t forget a side of crusty bread to soak up the flavorful pan juices!
Ham Shank for Large Gatherings
Ham shank is an excellent choice when feeding a crowd‚ offering a substantial and flavorful centerpiece. Its size makes it ideal for buffets or family-style meals‚ providing ample portions for everyone. The slow-cooking methods‚ like braising or baking‚ are well-suited for preparing in advance‚ reducing stress on the day of the event.
Consider doubling the glaze recipe to ensure sufficient coverage. Pre-slice the ham shank after cooking for easier serving. Leftovers are fantastic in sandwiches‚ soups‚ or casseroles‚ extending the meal’s enjoyment. A high-quality ham‚ like Dakin Farm‚ truly elevates the experience!
Leftover Ham Shank Recipes
Leftover ham shank offers incredible versatility! Transform it into hearty soups‚ like split pea or ham and bean‚ maximizing flavor and minimizing waste. Dice the meat for flavorful omelets‚ quiches‚ or breakfast hashes‚ adding a savory kick to your morning routine. Create delicious sandwiches with mustard and cheese‚ or build a Cuban-inspired press.
Shredded ham shank is perfect for pasta sauces‚ pizzas‚ or even shepherd’s pie. Don’t forget the bone – simmer it for a rich‚ flavorful stock! Utilizing every part of the ham ensures a satisfying and economical culinary experience.
Tips for Moist and Tender Ham Shank
Moist heat methods‚ like braising or foil-wrapping‚ are key! Avoid overcooking‚ and allow the ham shank to rest post-cooking for maximum tenderness and juiciness.
Moist Heat vs. Dry Heat
Employing moist heat is generally preferred when cooking a ham shank‚ as it breaks down the tough connective tissues over a longer period‚ resulting in incredibly tender meat. Braising‚ or baking covered in foil‚ exemplifies this approach‚ creating a steamy environment that keeps the ham moist throughout the cooking process.
Conversely‚ dry heat methods‚ while capable of producing a flavorful crust‚ can easily lead to a dry and less tender shank if not carefully monitored. The initial foil-covered stage‚ followed by uncovering for caramelization‚ combines both techniques for optimal results. Remember‚ a Coca-Cola soak also contributes to moisture retention!
Avoiding Overcooking
Overcooking a ham shank is a common pitfall‚ leading to dry‚ tough meat. Vigilance is key! Relying on a meat thermometer is crucial; aim for the target internal temperature‚ avoiding exceeding it. Remember‚ carryover cooking will continue to raise the temperature even after removal from the oven.
The initial foil wrapping helps retain moisture‚ preventing premature drying. Regularly check for tenderness with a fork – it should easily pierce the meat. Resting the ham shank after cooking is equally vital‚ allowing the juices to redistribute‚ ensuring a moist and flavorful final product.
Resting the Ham Shank
Resting the ham shank is a critical‚ often overlooked step for achieving optimal tenderness and juiciness. After removing it from the oven‚ allow the shank to rest‚ loosely tented with foil‚ for at least 15-20 minutes. This allows the muscle fibers to relax and reabsorb the flavorful juices‚ preventing them from escaping when sliced.
During resting‚ carryover cooking continues‚ slightly increasing the internal temperature. This period is essential for a consistently moist and flavorful result. Don’t rush this process; patience yields a significantly improved final product‚ maximizing the enjoyment of your perfectly cooked ham shank.
Ham Shank vs. Other Ham Cuts
Ham shanks‚ unlike the butt‚ are best suited for long‚ slow cooking due to their tougher texture‚ delivering rich flavor when braised or baked.
Butt vs. Shank: Differences
Ham butts and shanks differ significantly in both texture and ideal cooking methods. The butt‚ originating from the upper portion of the leg‚ is a larger‚ meatier cut‚ often pre-cooked and requiring primarily reheating. Conversely‚ the shank‚ taken from the lower leg‚ is leaner and contains a bone‚ demanding longer‚ slower cooking to become tender.
Shanks excel in braising‚ absorbing flavors beautifully‚ while butts are well-suited for baking with glazes. The shank’s bone contributes to a richer broth‚ making it ideal for soups and stews. Choosing between them depends on your desired outcome – a quick‚ glazed ham versus a deeply flavorful‚ fall-off-the-bone experience.
Which Cut is Best for Your Needs?
Selecting the right ham cut hinges on your cooking time and desired outcome. For large gatherings and a quicker preparation‚ a pre-cooked ham butt is convenient‚ needing only glazing and reheating. However‚ if you prioritize intense flavor and a tender‚ fall-off-the-bone texture‚ a ham shank is the superior choice.
Shanks require patience – soaking‚ slow cooking‚ and potentially braising – but reward you with a deeply satisfying meal. Consider your skill level and available time; a shank is perfect for a weekend project‚ while a butt suits a busy weeknight. Ultimately‚ quality hams‚ like those from Dakin Farm‚ elevate either cut.
Sourcing High-Quality Hams
Dakin Farm Hams are consistently praised for exceptional flavor‚ while seeking recommendations from a trusted local butcher ensures freshness and expert advice.
Dakin Farm Hams
Dakin Farm Hams consistently receive enthusiastic endorsements from home cooks‚ celebrated for their superior quality and distinctive flavor profile. Many long-time fans‚ like one commenter recalling a Vermont aunt’s introduction‚ attest to their exceptional taste.
The secret to a truly delicious ham‚ according to enthusiasts‚ often lies in the quality of the ham itself‚ and Dakin Farm delivers on this front. Choosing a high-quality ham like theirs minimizes the need for excessive glazing or complex preparations‚ allowing the natural flavors to shine through during cooking.
Their hams are a reliable foundation for a successful and flavorful meal‚ particularly when preparing a ham shank.
Local Butcher Recommendations
Seeking advice from a local butcher can significantly enhance your ham shank experience. They possess invaluable expertise in selecting quality cuts and can offer personalized recommendations tailored to your preferences.
A skilled butcher can expertly trim excess fat‚ ensuring optimal flavor and tenderness. They can also advise on the shank’s origin and whether it’s smoked or raw‚ influencing your cooking approach.
Building a relationship with your local butcher provides access to fresh‚ high-quality hams and personalized guidance‚ elevating your cooking from good to exceptional. Don’t hesitate to ask for their insights!